先日の勉強会と資料は次に掲載されています。もしご都合がつけば、次回の勉強会にぜひご参加ください。
先日の勉強会でPodmanが取り上げられたので、早速できるだけ新しいバージョンのPodmanを使ってみようと思いました。 偉そうなことをあれだけべらべら言っていましたが、macOSでPodman Desktopは使っているものの、LinuxでPodmanを使うのは久しぶりです。 Fedoraの新しいバージョンが出るたびに毎回チェックはしているのですけどね。
今回はLinuxディストリビューションはFedora 40を使って、現時点で最新のPodmanを導入してみます。 実行した結果、Fedora 40ではPodman 5.1.1が使えるようです。
$ dnf info podman
...
名前         : podman
エポック     : 5
バージョン   : 5.1.1
リリース     : 1.fc40
Arch         : aarch64
サイズ       : 50 M
ソース       : podman-5.1.1-1.fc40.src.rpm
リポジトリー : @System
repo から    : updates
概要         : Manage Pods, Containers and Container Images
URL          : https://podman.io/
ライセンス   : Apache-2.0 AND BSD-2-Clause AND BSD-3-Clause AND ISC AND MIT AND MPL-2.0
説明         : podman (Pod Manager) is a fully featured container engine that is a simple
             : daemonless tool.  podman provides a Docker-CLI comparable command line that
             : eases the transition from other container engines and allows the management of
             : pods, containers and images.  Simply put: alias docker=podman.
             : Most podman commands can be run as a regular user, without requiring
             : additional privileges.
             :
             : podman uses Buildah(1) internally to create container images.
             : Both tools share image (not container) storage, hence each can use or
             : manipulate images (but not containers) created by the other.
早速インストールして使ってみます。 podman-dockerパッケージも同時にインストールしてみます。このパッケージはdockerコマンドをpodmanのコマンドに翻訳してくれる動きをするものです。
$ sudo dnf install -y podman podman-docker
ではまず、Ubuntuコンテナを動かしてみましょう。
$ podman run -it --rm ubuntu
Resolved "ubuntu" as an alias (/etc/containers/registries.conf.d/000-shortnames.conf)
Trying to pull docker.io/library/ubuntu:latest...
Getting image source signatures
Copying blob eed1663d2238 done   |
Copying config ffb64c9b7e done   |
Writing manifest to image destination
root@bfb6be3e85c7:/#
root@bfb6be3e85c7:/# cat /etc/os-release
PRETTY_NAME="Ubuntu 24.04 LTS"
NAME="Ubuntu"
VERSION_ID="24.04"
VERSION="24.04 LTS (Noble Numbat)"
VERSION_CODENAME=noble
ID=ubuntu
ID_LIKE=debian
HOME_URL="https://www.ubuntu.com/"
SUPPORT_URL="https://help.ubuntu.com/"
BUG_REPORT_URL="https://bugs.launchpad.net/ubuntu/"
PRIVACY_POLICY_URL="https://www.ubuntu.com/legal/terms-and-policies/privacy-policy"
UBUNTU_CODENAME=noble
LOGO=ubuntu-logo
問題なく、コンテナを実行できました。 コンテナの中はUbuntuそのまんまです。
Podmanの設定は/etc/containers/の下に格納されているようです。
詳細は後述しますが、設定のテンプレートは/usr/share/containersにあります。
コマンドを実行したときに、出力されたレジストリーの設定の中身を見てみましょう。 ファイルを開くと、色々なディストリビューションのURLがずらずらと書かれています。この設定により、適切なレジストリーからコンテナーイメージを取得しているようです。ちょっと変わってました。
$ less /etc/containers/registries.conf.d/000-shortnames.conf

[aliases]
  # almalinux
  "almalinux" = "docker.io/library/almalinux"
  "almalinux-minimal" = "docker.io/library/almalinux-minimal"
  # Amazon Linux
  "amazonlinux" = "public.ecr.aws/amazonlinux/amazonlinux"
  # Arch Linux
  "archlinux" = "docker.io/library/archlinux"
  # centos
  "centos" = "quay.io/centos/centos"
...
  # docker
  "alpine" = "docker.io/library/alpine"
...
  # Fedora
  "fedora-bootc" = "registry.fedoraproject.org/fedora-bootc"
  "fedora-minimal" = "registry.fedoraproject.org/fedora-minimal"
  "fedora" = "registry.fedoraproject.org/fedora"
...
  # Red Hat Enterprise Linux
...
  "ubi9" = "registry.access.redhat.com/ubi9"
  "ubi9-minimal" = "registry.access.redhat.com/ubi9-minimal"
  "ubi9-init" = "registry.access.redhat.com/ubi9-init"
  "ubi9-micro" = "registry.access.redhat.com/ubi9-micro"
...
  # Ubuntu
  "ubuntu" = "docker.io/library/ubuntu"
 ...
Dockerの場合は、暗黙的にDocker Hubのイメージを使うように設定されています(設定で変えられます)。 一方Podmanは、あらかじめよく使われるであろうイメージについては定義されており、適切なレジストラーから簡単にイメージを取得できるようになっていますし、設定は簡単に変えられるのでかなり良い感じです。
設定もテキストで記述するだけなので、インデントや括弧、カンマなどの有無で設定が無効になってイライラする必要はありません*1。
もう一つの設定を見てみます。これによると、左から優先して定義したイメージレジストリーに確認しに行きます。Docker Hubを示すdocker.ioは一番最後に設定されています。定義されたイメージは先の設定から順に、未定義のイメージは次の設定に従って順に参照します。Docker Hubのプル制限回避がされているわけですね。ここにquay.ioも追加しておくと便利かもしれません。
$ less /etc/containers/registries.conf
...
# # An array of host[:port] registries to try when pulling an unqualified image, in order.
unqualified-search-registries = ["registry.fedoraproject.org", "registry.access.redhat.com", "docker.io"]
そのほかの設定のデフォルトは/usr/share/containersにあります。containers.confがPodmanの主な設定がまとめられています。設定をデフォルトから変えたい場合はこの設定を/etc/containers/にコピーします。
この設定にはリードオンリーファイルシステムの設定やseccomp、LinuxケーパビリティーやSELinuxを中心としたセキュリティー周りの設定、ランタイムの設定などが含まれます。
この辺りについては過去に書いた記事をご覧ください。
ざっくり言うと、Podmanはデフォルトでもかなり安全に使えるように設定されています。 設定を変更すればさらに引き締めることも可能です。
dockerコマンドでPodmanを使ってみる
podman-dockerパッケージをインストールした場合は、dockerコマンドを使ってPodmanを使えます。
試しに色々実行してみましょう。
//実行すると、Podmanのバージョンに置き換えて実行されます
$ docker version
Emulate Docker CLI using podman. Create /etc/containers/nodocker to quiet msg.
Client:       Podman Engine
Version:      5.1.1
API Version:  5.1.1
Go Version:   go1.22.3
Built:        Tue Jun  4 09:00:00 2024
OS/Arch:      linux/arm64

//Podmanのヘルプが表示されます
$ docker --help
Emulate Docker CLI using podman. Create /etc/containers/nodocker to quiet msg.
Manage pods, containers and images

Usage:
  podman [options] [command]
...

//コンテナの起動も、うっかりdockerコマンドを実行しても動作します
$ docker run -it --rm ubuntu
Emulate Docker CLI using podman. Create /etc/containers/nodocker to quiet msg.
root@a0c267e8011d:/#
root@a0c267e8011d:/# exit
exit

//一時的なNGINXWebサーバーの起動も問題ないです
$ docker run --name=cont1 -d -p 8080:80 -it nginx:alpine
Emulate Docker CLI using podman. Create /etc/containers/nodocker to quiet msg.
? Please select an image:
  ▸ registry.fedoraproject.org/nginx:alpine
    registry.access.redhat.com/nginx:alpine
    docker.io/library/nginx:alpine
...
✔ docker.io/library/nginx:alpine
Trying to pull docker.io/library/nginx:alpine...
...
//コンテナ一覧の表示もいい感じに置き換えて実行してくれます
$ docker ps -a
Emulate Docker CLI using podman. Create /etc/containers/nodocker to quiet msg.
CONTAINER ID  IMAGE                           COMMAND               CREATED         STATUS         PORTS                         NAMES
e45594fe4f4f  docker.io/library/nginx:alpine  nginx -g daemon o...  10 seconds ago  Up 11 seconds  0.0.0.0:8080->80/tcp, 80/tcp  cont1

//コンテナは問題なく動いています
$ curl http://localhost:8080
<!DOCTYPE html>
<html>
<head>
<title>Welcome to nginx!</title>
<style>
html { color-scheme: light dark; }
body { width: 35em; margin: 0 auto;
font-family: Tahoma, Verdana, Arial, sans-serif; }
</style>
</head>
<body>
<h1>Welcome to nginx!</h1>
<p>If you see this page, the nginx web server is successfully installed and
working. Further configuration is required.</p>

<p>For online documentation and support please refer to
<a href="http://nginx.org/">nginx.org</a>.<br/>
Commercial support is available at
<a href="http://nginx.com/">nginx.com</a>.</p>

<p><em>Thank you for using nginx.</em></p>
</body>
</html>
Podmanでpodman-composeを使ってみる
Podmanをインストールした環境にpodman-composeパッケージをインストールすると、Podmanでdocker-composeと同じようなコンテナアプリケーションをデプロイ可能です。
podman-composeは現在、Containersプロジェクトの一つなんですね。 現在も開発が継続されています。次にこれを使ってみたいと思います。
- https://rheb.hatenablog.com/entry/podman3_docker_compose
- https://github.com/containers/podman-compose
- https://github.com/docker/awesome-compose
//podman-composeとgit-coreを入れる
# dnf install podman-compose git-core

//サンプルアプリをデプロイしてみる
# git clone https://github.com/docker/awesome-compose.git
# cd awesome-compose/apache-php/
# podman-compose up -d
# podman-compose ps
CONTAINER ID  IMAGE                            COMMAND               CREATED        STATUS        PORTS                       NAMES
0d879028e2a0  localhost/apache-php_web:latest  apache2-foregroun...  4 seconds ago  Up 4 seconds  0.0.0.0:80->80/tcp, 80/tcp  apache-php_web_1
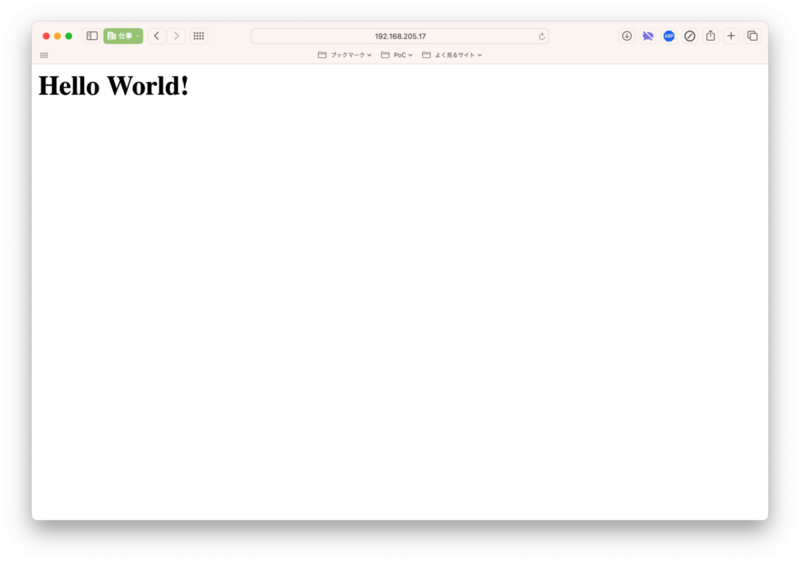
問題なくデプロイできました。つまり、Docker Compose用に書かれたマニフェストを使って、(内容を変更することなく)Podmanとpodman-composeでコンテナアプリケーションのデプロイができるということがわかりました。
実際にブラウザーでアクセスしてみると、次のように表示されます。非常にシンプルです。

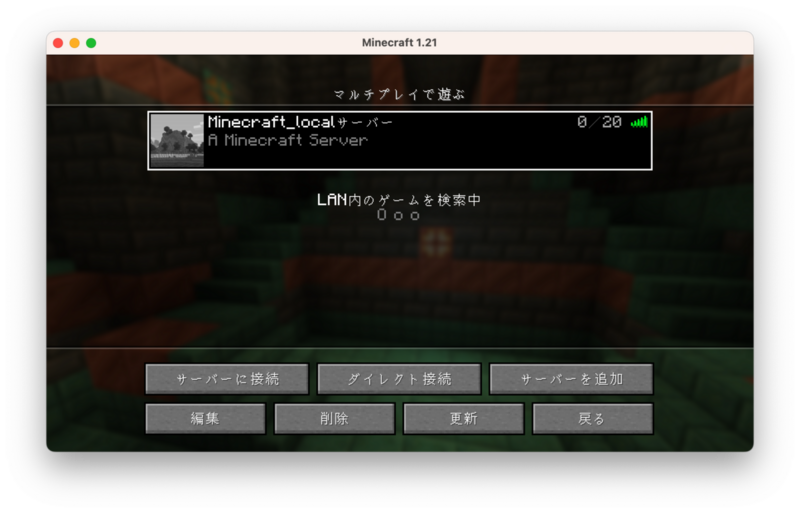
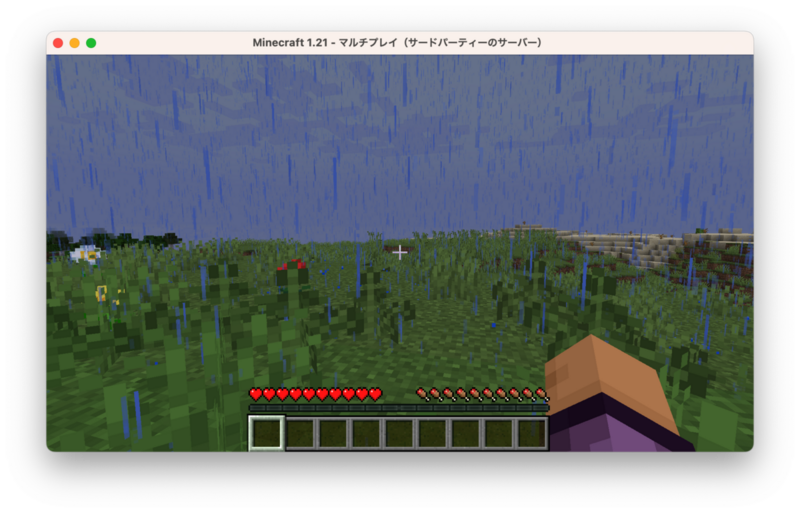
ちなみに、PodmanとPodman-composeでMinecraft Serverを立てて遊ぶこともできました(デモ版ではできません。有償版の購入が必要です)。 実行してみると、標準的なポート25565で待ち受けしていました。
# podman-compose ps
CONTAINER ID  IMAGE                                   COMMAND     CREATED      STATUS                PORTS                                NAMES
1867f1612515  docker.io/itzg/minecraft-server:latest              2 hours ago  Up 2 hours (healthy)  0.0.0.0:25565->25565/tcp, 25565/tcp  minecraft_minecraft_1

これをアドレスに入力してサーバーを追加すると、外部のMinecraft Serverとしてクライアントから接続して使えるようです。macOSのJavaクライアントでキー操作するのはちょっと慣れが必要ですね。Modを入れてコントローラーで操作できるようにしたいところですね。

今回はPodmanの最新版を通じてPodmanを振り返ってみました。 PodmanとPodman-composeを使えば、おおよそDockerから乗り換えるのは簡単そうです。
*1:YAMLとかjson形式のファイルを人力で書くのは、人間にはまだ早いと筆者は常々思っています
